Business Rules for Forms lets you perform conditional actions on certain fields within a form. This lets your users perform actions on certain fields, control ticket lifecycle, and implement field-level access on forms to ensure that only the right stakeholders can modify the contents of specific fields.
You can create Business rules for the following:
Agents groups
Contact groups
You can create Business Rules at global and client level.
Note: Global rules are executed first, followed by client-level rules. This ensures that client-level rules override global rules when there is a conflict.
TABLE OF CONTENTS
How to create a Business Rule
To create Business rules, follow these steps:
In your Freshservice account, navigate:
Global Settings: Admin > Global Settings > Service Management > Service Desk Settings > Business Rules for Forms > Create New Rule.
Client-level: Admin > Workspace Settings > {Client Name} > Service Management > Service Desk Settings > Business Rules for Forms > Create New Rule.
Select one of the options for which you need to create a rule.
Enter the name and description of the business rule
Choose whether the rule applies to Requesters, Agents or Both using the Applies to the dropdown
Specify whether the rules need to execute on the new form, edit form or both using Execute on the dropdown
Add the conditions based on
Ticket form fields: Dynamic values on the form that trigger rules as the user fills the form
Logged in user fields: Attributes of the user submitting the form such as Department, Location, Role, Group etc
Current ticket fields: Static values of the record that is being modified.
Based on the condition you choose you can perform the following actions using the Perform an action option
Show and Hide field
Mandate and Non-mandate fields
Enable and Disable fields
Prevent form submission with a custom validation message
Set and Remove Dropdown Options
Alternatively, you can also Validate the form on submission with a custom error message if the conditions specified above are met and click Save
Manage Advanced Settings
In the advanced settings section, you can check the following boxes:
Auto-Reverse If False: This will reverse the action if the conditions specified aren’t met.
For eg. If you choose to mandate a particular field when the status is changed to Resolved, the Auto-Reverse if False checkbox will non-mandate the same field if the status is NOT Resolved.
Note: We recommend you to select this checkbox by default for all business rules to avoid creating another rule.
Enforce System-Wide: The following business rule will be applicable to all forms and when a ticket is updated through bulk action, list view edits, scenario automation and API requests.

You can enable/disable the toggle for a particular business rule from the list view
You can choose to edit/ delete/ clone a business rule from the list view

Additional information
The current ticket condition is applicable only on Edit Form and also allows you to create conditions based on Ticket Type and also the Requested Item/s of the underlying ticket
The Enforce system-wide option is not applicable to show/hide fields
You can test out error messages to see how it appear within the system before saving the Validate form on submission option
When there are multiple business rules acting on a particular field, the rule that executes last will take precedence. You can click on Reorder to change the order of execution
Business rules geared towards requesters work best if fields are configured to be both visible and editable in form fields
Use cases
You can use the business rules for the following scenarios.
Usecase- 1
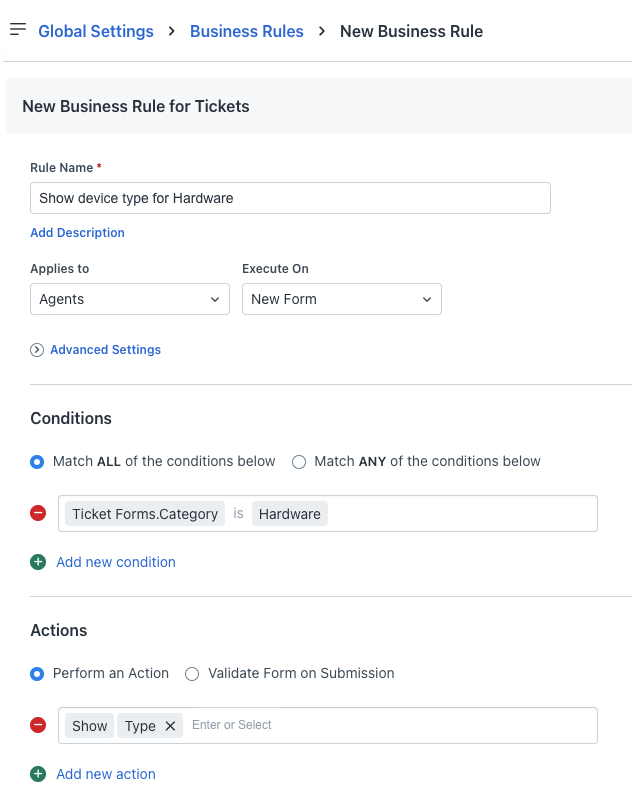
Let's take a scenario where you want to display the relevant categories based on a user's Location/Department/Group.

Usecase- 2
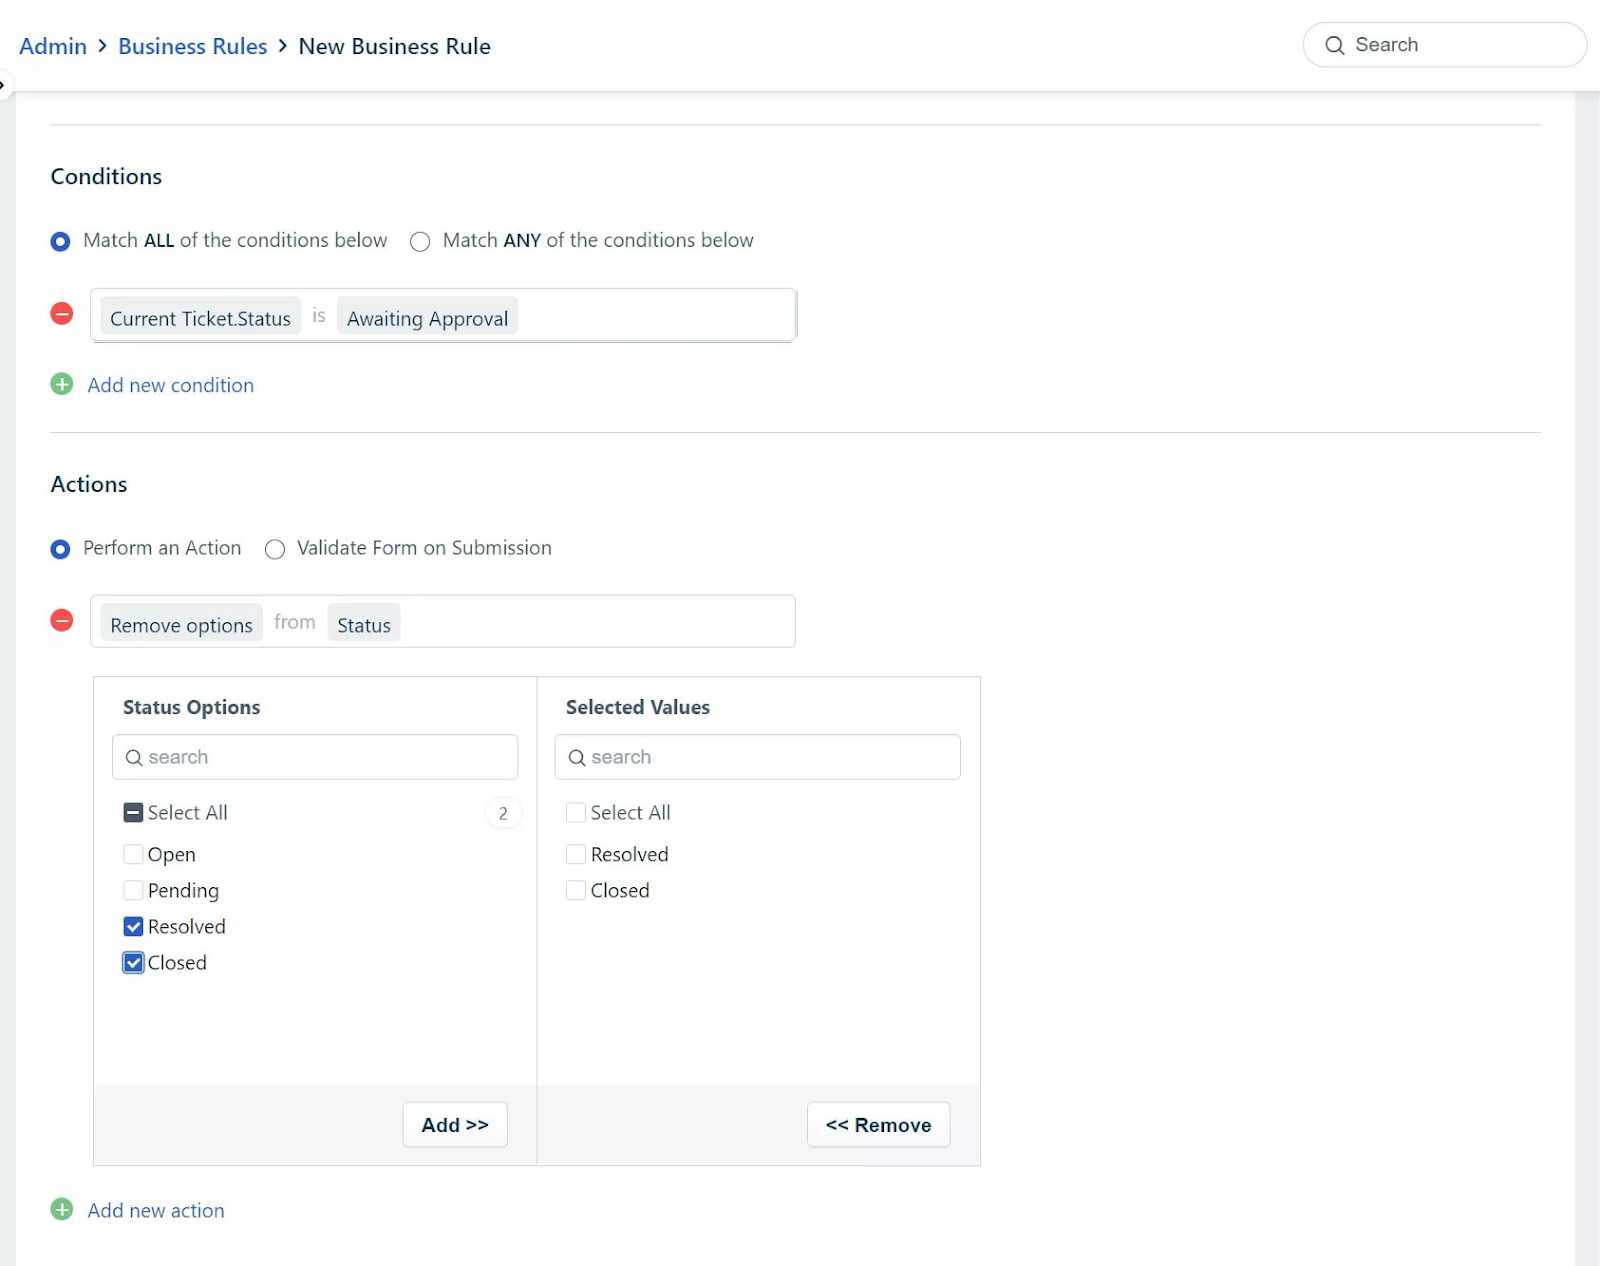
A scenario where you want to restrict the dropdown choices in the status field when a ticket is awaiting approval.
Usecase- 3
Let's take a scenario where when the ticket status is updated to pending mandate additional field.
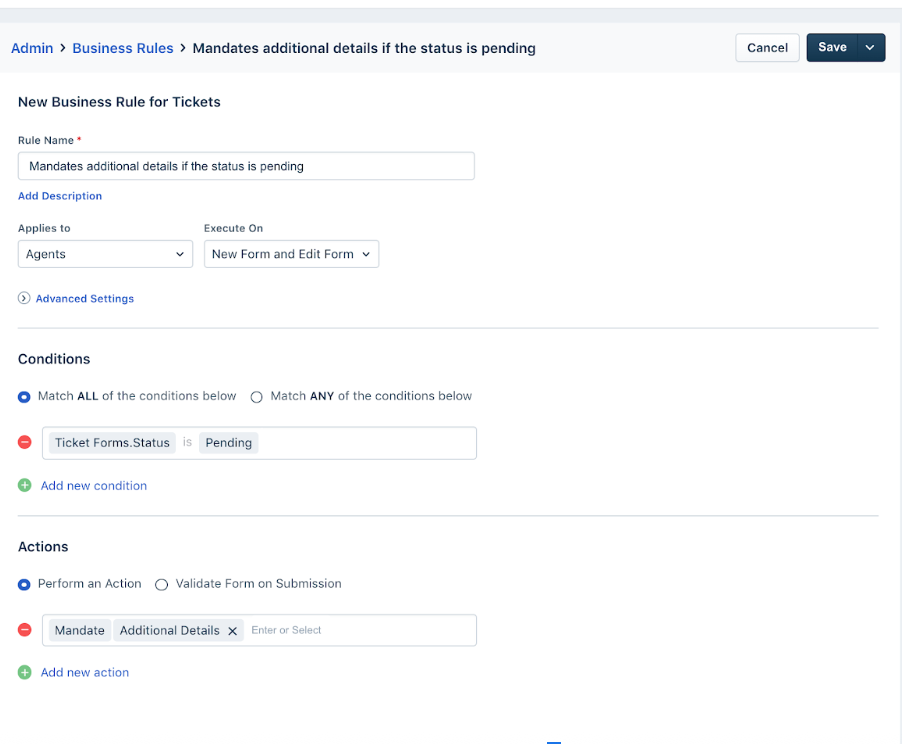
In this case, the agent can't bypass and set the status to pending without filling in the additional details field.
#Usecase- 4
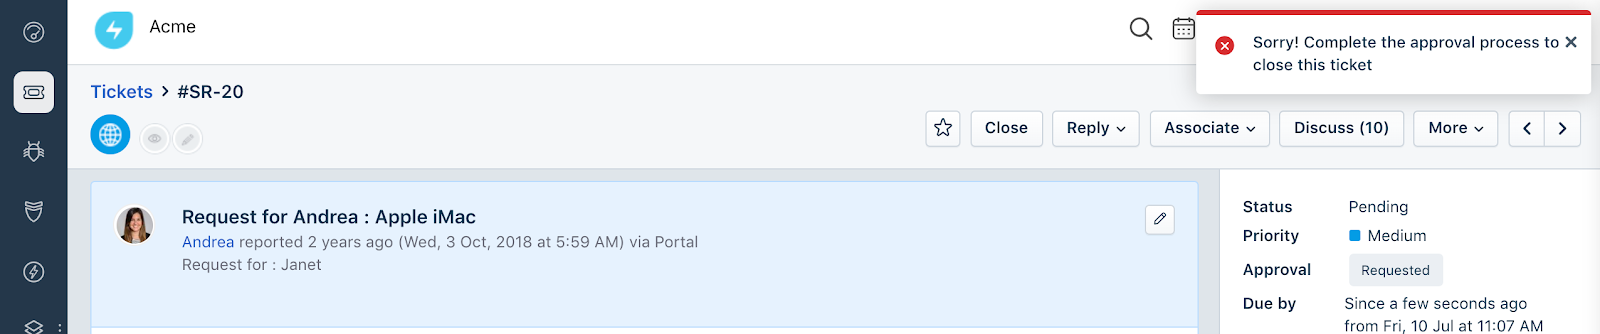
Let’s take a scenario where you want to prevent a ticket from being marked as closed if it’s awaiting approval.

In this case, you are using a custom status to indicate if a ticket is pending approval. If the agent tries to close or resolve a ticket that’s awaiting approval, the system will throw an error with the custom message configured by the user.
Tip: Use the sandbox account to test out your business rules.